The product master contains all information associated with the products such as code, name, reference, brand, category, prices, tax, and other attributes. In this product master, you can create or modify items one by one or with bulk uploading items.
This article briefly explains how to create a product master in the Aerchain portal.
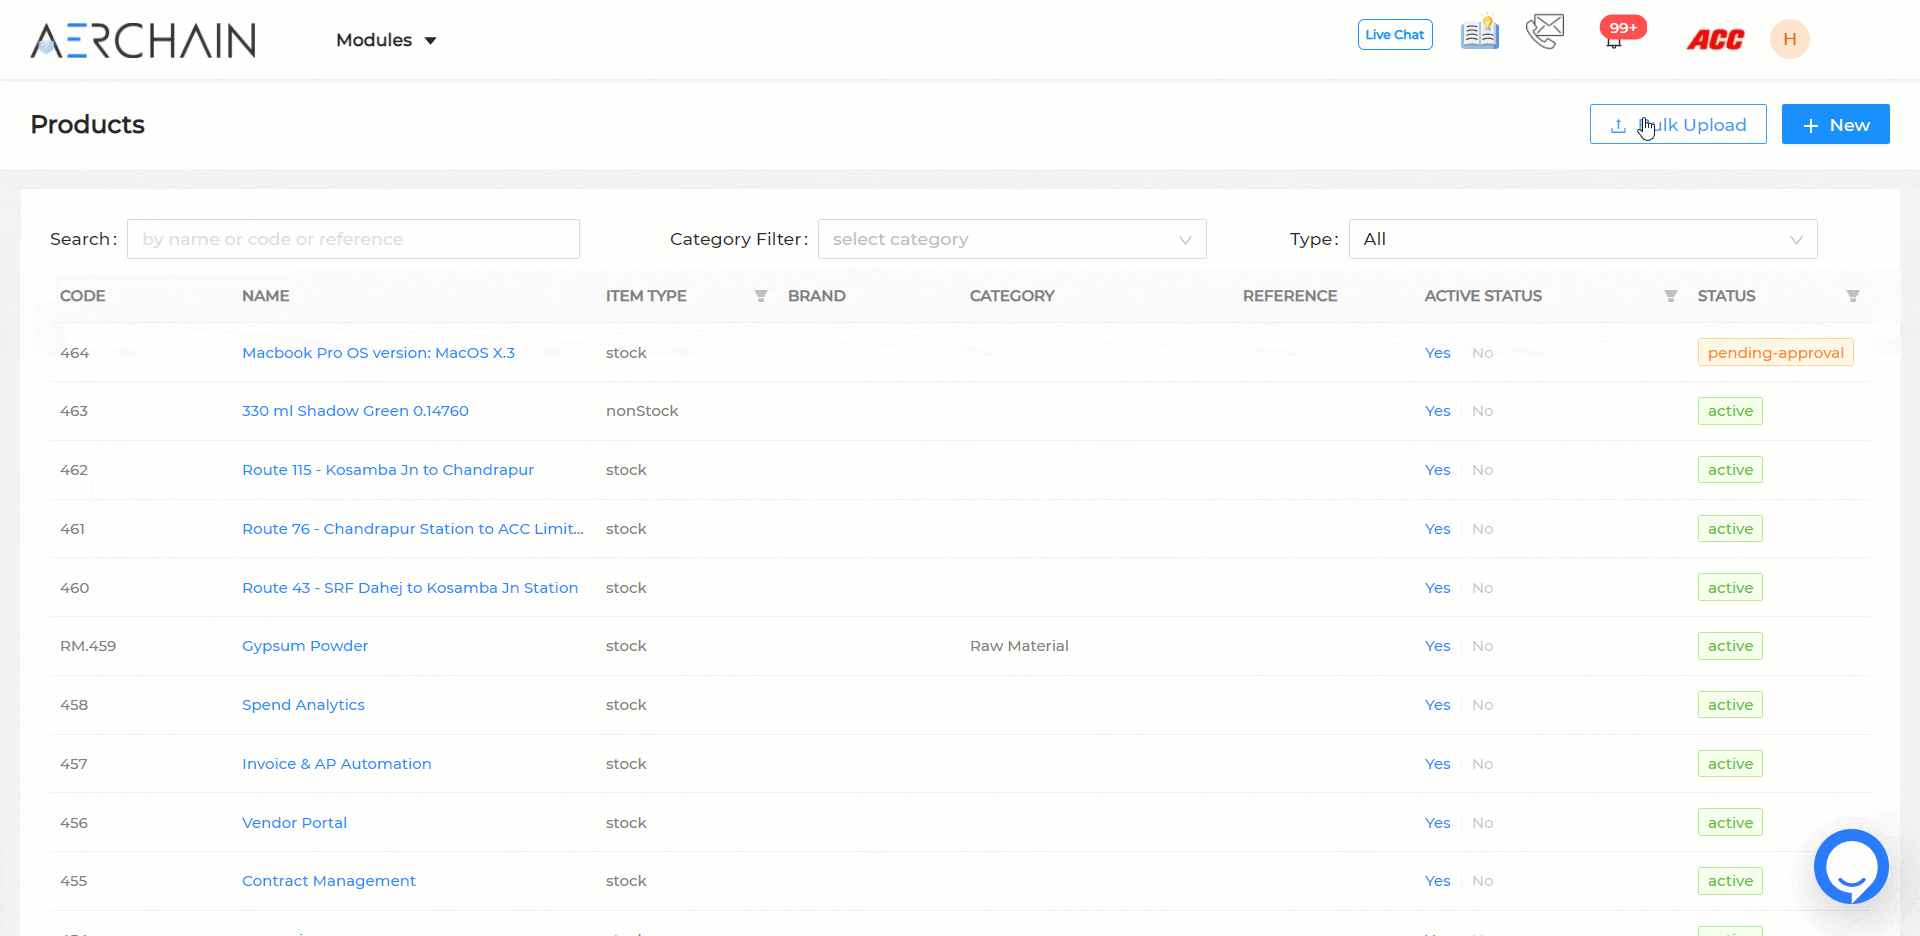
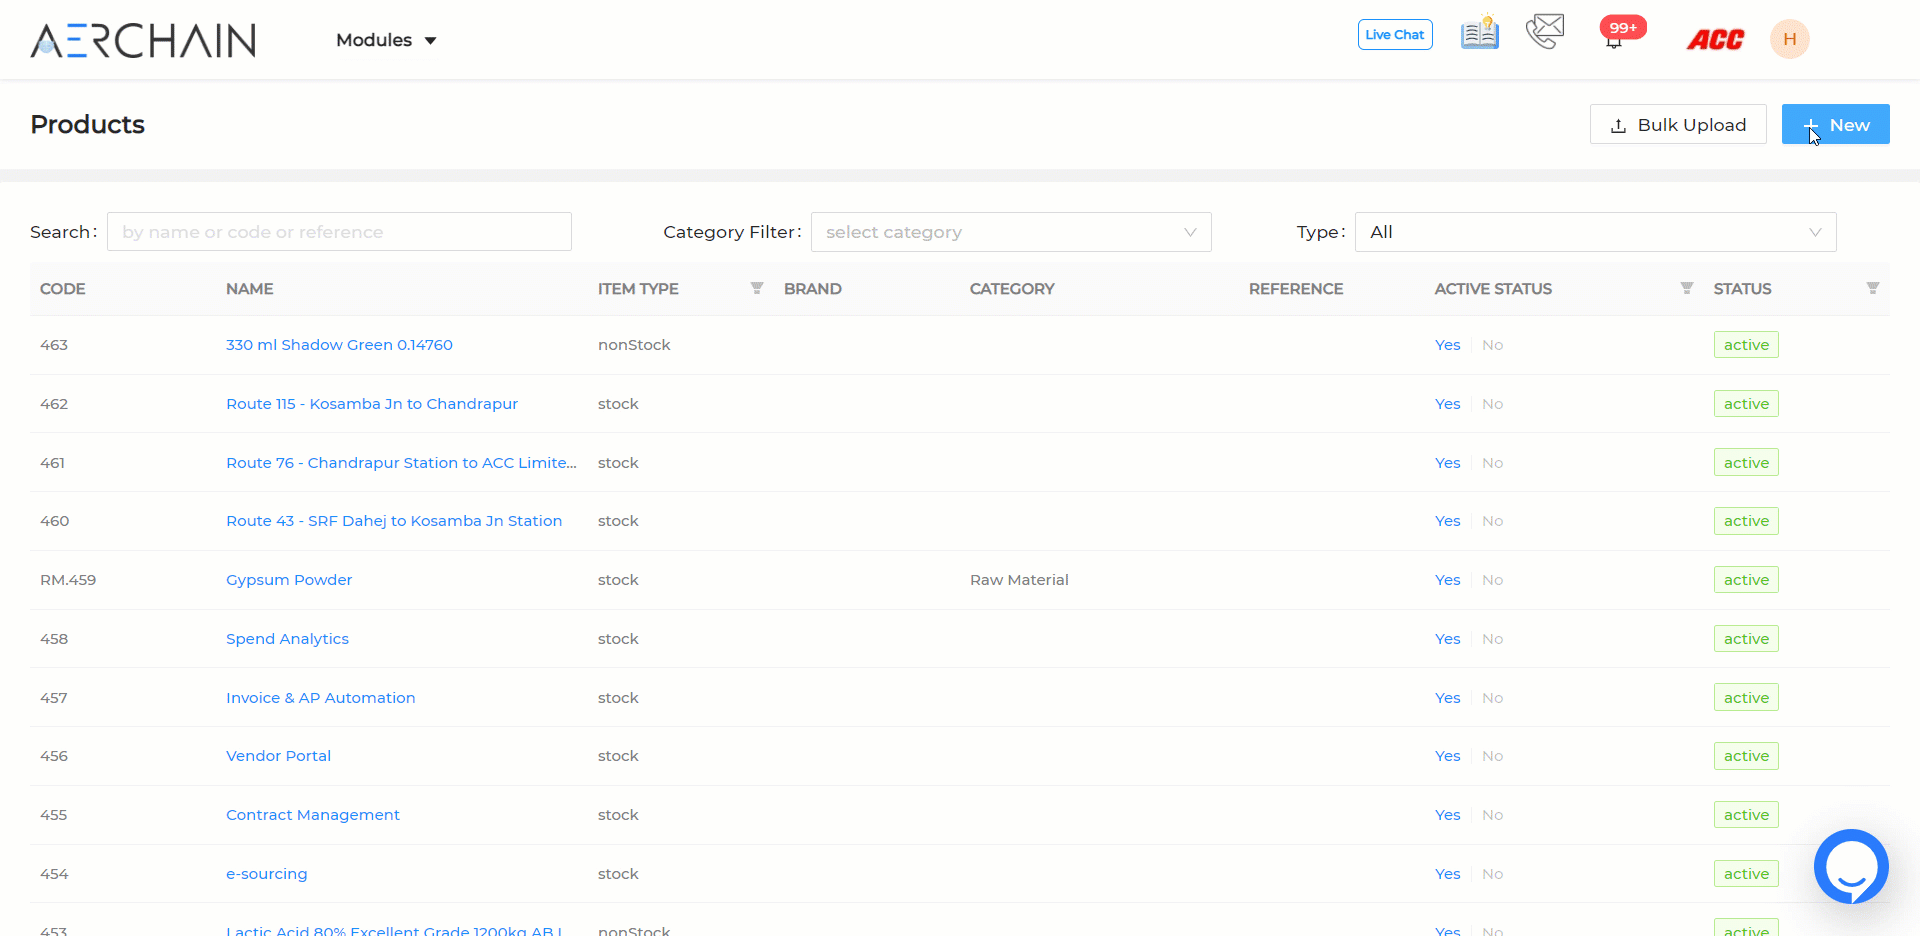
In the first step, click on the Modules from the header. From the Master's section, select Products.
The Product listing page gets open displaying product information such as:
Code: It displays the unique code given to the product item.
Name: It displays the name of the product item
Item Type: This display type of item i.e goods or services
Brand: Name of the brand associated with the product item.
Category: It displays the category to which the product item belongs.
Reference: Reference related to the product item if any.
Active Status: This column displays whether the product item is Active or Inactive in the transactions.
Status: There are four statuses for product items such as:
Inactive - This indicates the product item is marked as Inactive and cannot be used for transactions.
Active - This indicates the product item is Active and available for the transactions.
Pending Approval - This indicates the product item is submitted but not approved by approvers.
Rejected - This indicates that the product item was rejected.
Search: It enables you to quickly search for specific product items by entering the code or reference.
Category filter: You can also search for any product by selecting a category from the dropdown.
Type: There are two types in the dropdown i.e. goods and services. You can select any type of product.
Product Configuration
In the Orgs Settings > Go to Field Customization,
In the Product tab, you can see the product configuration settings that display all the system fields with two options; Required or Mandatory. You can select either of the options which will be visible in the product form.
Custom fields: Here you can add additional custom fields in the product form. Click on the Add Custom fields button, A pop-up window will open, enter the field label name, and select field type from the dropdown. There are three field types Input box, Dropdown selection, Radio Checkbox. Then select whether the field is mandatory or required.
Steps to create a new product item:
There are two ways to create a new product item in Product Master.
Bulk Upload: Use the "Bulk Upload" option from the right corner when there are many items to be added. Initially download the file, then only fill the mandatory fields in the excel template which are mandatory in Orgs Settings as described below:

Now, once all the mandatory fields are filled accurately in the template then upload the updated file using the ‘Upload Product File’ button in the system.
Once you upload the file, all the products are added to the list. You can click on the "Validate" button to check if all the product details are correct. If it is incorrect, then you can select the "Download the template with error" button and re-upload the file after correcting the errors. If all the details are correctly filled it will not throw any errors and the product list is uploaded in the product master.
Create item one-by-one in the product master:
The person with access to create a new product in product master can add an item using the +New tab option from the right corner of the product listing page.
The new product page will open. Now, fill all the mandatory fields in the new product form such as Name, Unit, Taxes, and HSN. You can also upload product images from the Images option in the form.
Notes and attachments: Here you can leave a note if any for the product, you can even upload an attachment if required.
Finally, click on the Create button to add a new product to the Product Master list.
Create an Item directly from the Create page: You can also create an item directly from the Create page of all the transactions such as Purchase order, RFQ, Requisitions, etc only if you have access to create a product item.
Once, the product item is created then it will go for approval if approval flow is configured.